This feature requires a paid Data Fetcher plan.
Set up request webhook URL
Authorize Data Fetcher
Before using webhooks, you need to authorize Data Fetcher to access your Airtable account. You only need to complete this once. For detailed authorization instructions, see our guide.Turn on the webhook URL
- On the request screen, click the Webhook URL tab.
- Toggle on Turn on webhook for request.
- Copy the webhook URL by clicking the copy icon (📋) next to it. Your webhook URL will look similar to this:
- Test the webhook by visiting the URL in your browser. You should see a success message, and you can verify the request ran by checking the Run History.
Using webhook URLs
Run for all records
Once your webhook is active, calling the webhook URL will execute your request with its current configuration. This is useful for triggering data imports or updates from external systems.Run for a specific record
You can target a specific record by adding arecord_id parameter to the webhook URL. First, make sure you’ve selected an input table and input view in your request settings.
With the record ID parameter, your webhook URL becomes:
Integrate with Airtable Automations
You can trigger Data Fetcher requests directly from Airtable Automations, allowing you to run requests when records are updated, forms are submitted, conditions are met, or any other automation trigger fires.Basic automation setup
- Create an Airtable automation with your desired trigger (e.g., When a record updated).
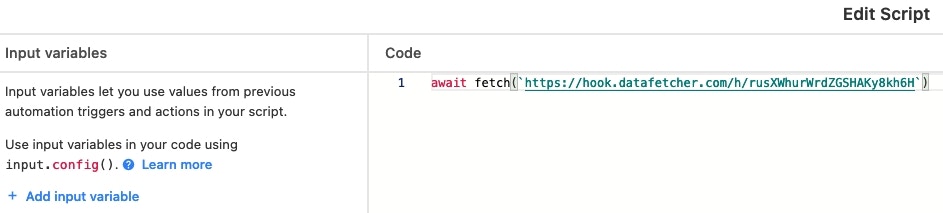
- For the automation action, select Run a script.
- Add this script, replacing
YOUR_WEBHOOK_URLwith your actual webhook URL:
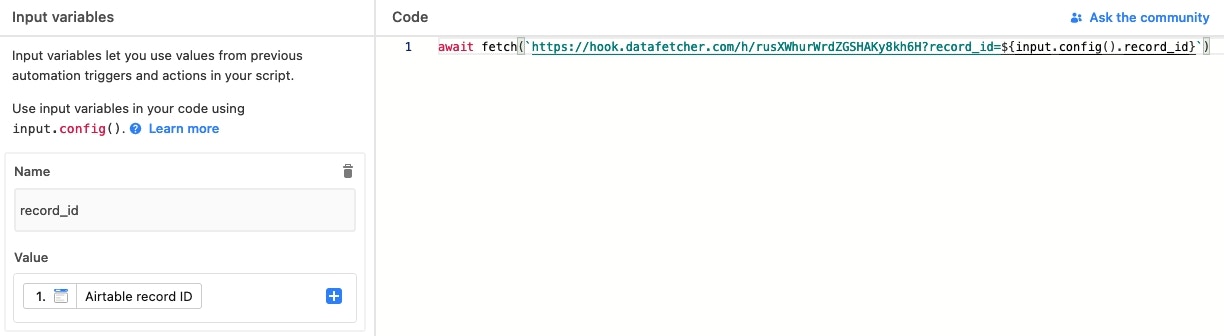
Target a specific record from automation
To run the request for only the record that triggered the automation:- In your Airtable automation, add an input variable called
record_idwith the record ID from the trigger. - Use this script instead, replacing
YOUR_WEBHOOK_URLwith your webhook URL: